Kate
Before we start, it’s important to note that Kate relies on the presence of syntax highlighting file for the usage of the LSP. Therefore, we’ll set up the syntax highlighting first.
Syntax Highlighting
Section titled “Syntax Highlighting”The file slint.ksyntaxhighlighter.xml ↗ needs to be copied into a location where Kate can find it. See the kate documentation ↗
On Linux, this can be done by running this command
mkdir -p ~/.local/share/org.kde.syntax-highlighting/syntax/wget https://raw.githubusercontent.com/slint-ui/slint/master/editors/kate/slint.ksyntaxhighlighter.xml -O ~/.local/share/org.kde.syntax-highlighting/syntax/slint.xmlOn Windows, download slint.ksyntaxhighlighter.xml ↗ into %USERPROFILE%\AppData\Local\org.kde.syntax-highlighting\syntax
After setting up the syntax highlighting, you can now install the Slint Language server. Check the LSP Documentation for instructions.
Once it is installed, go to Settings > Configure Kate. In the Plugins section, enable the LSP-Client plugin. This will add a LSP Client section in the settings dialog. In that LSP Client section, go to the User Server Settings, and enter the following in the text area:
{ "servers": { "Slint": { "path": ["%{ENV:HOME}/.cargo/bin", "%{ENV:USERPROFILE}/.cargo/bin"], "command": ["slint-lsp"], "highlightingModeRegex": "Slint" } }}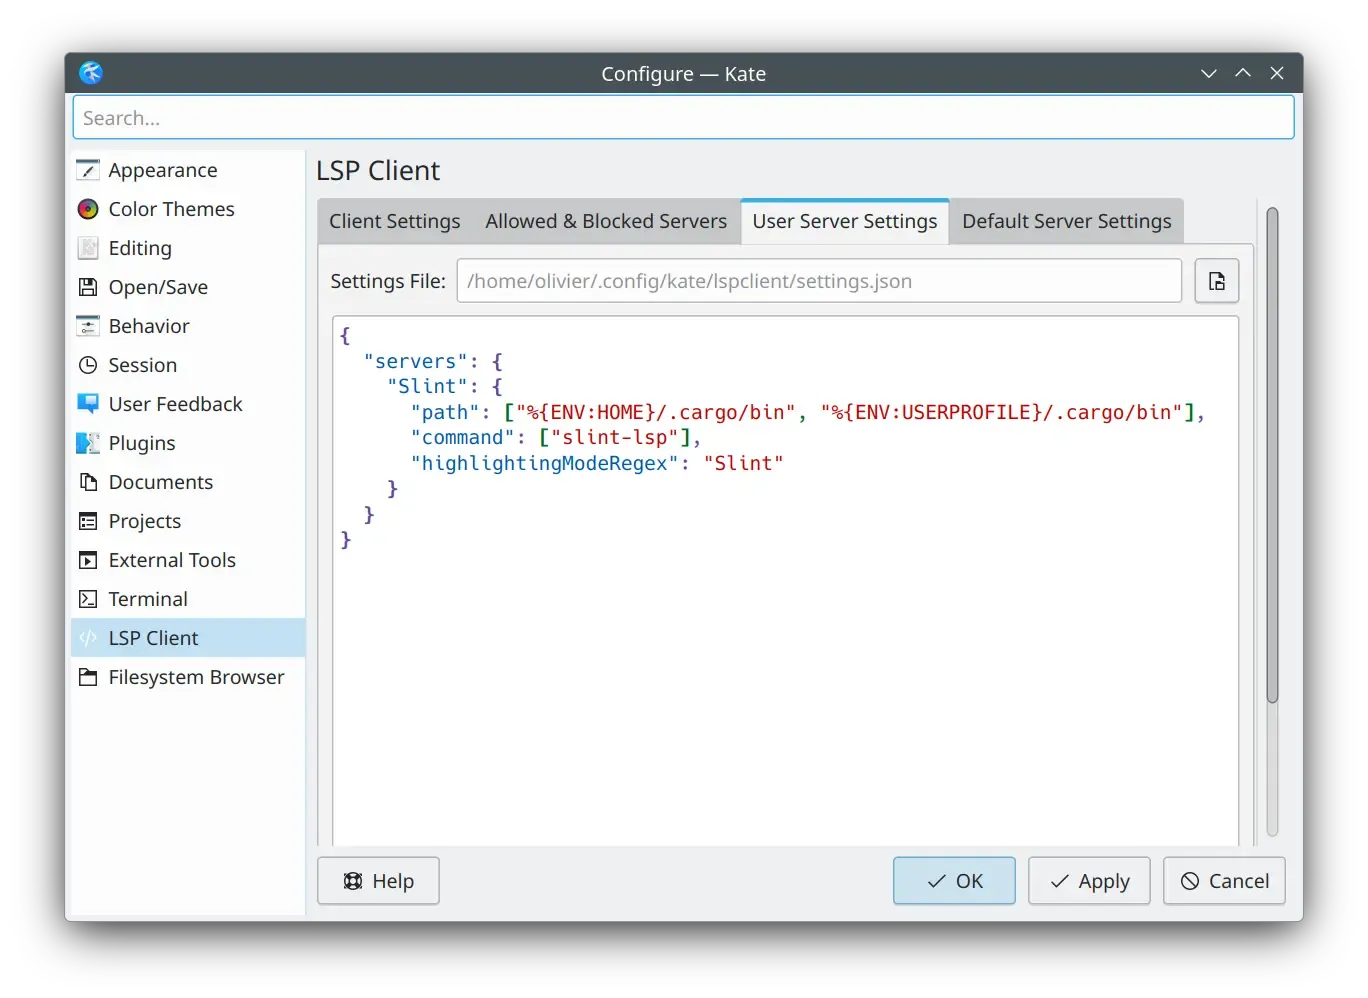
Live Preview
Section titled “Live Preview”Once the LSP is correctly set up, to preview a component, first, position your cursor on the name definition of the component you want to preview
(for instance, MainWindow in component MainWindow inherits Window {).
Then, activate the Show Preview code action.
You can do this by using the Alt+Enter shortcut to bring up the code action menu,
or find it in the menu bar at LSP Client > Code Action > Show Preview
© 2026 SixtyFPS GmbH